
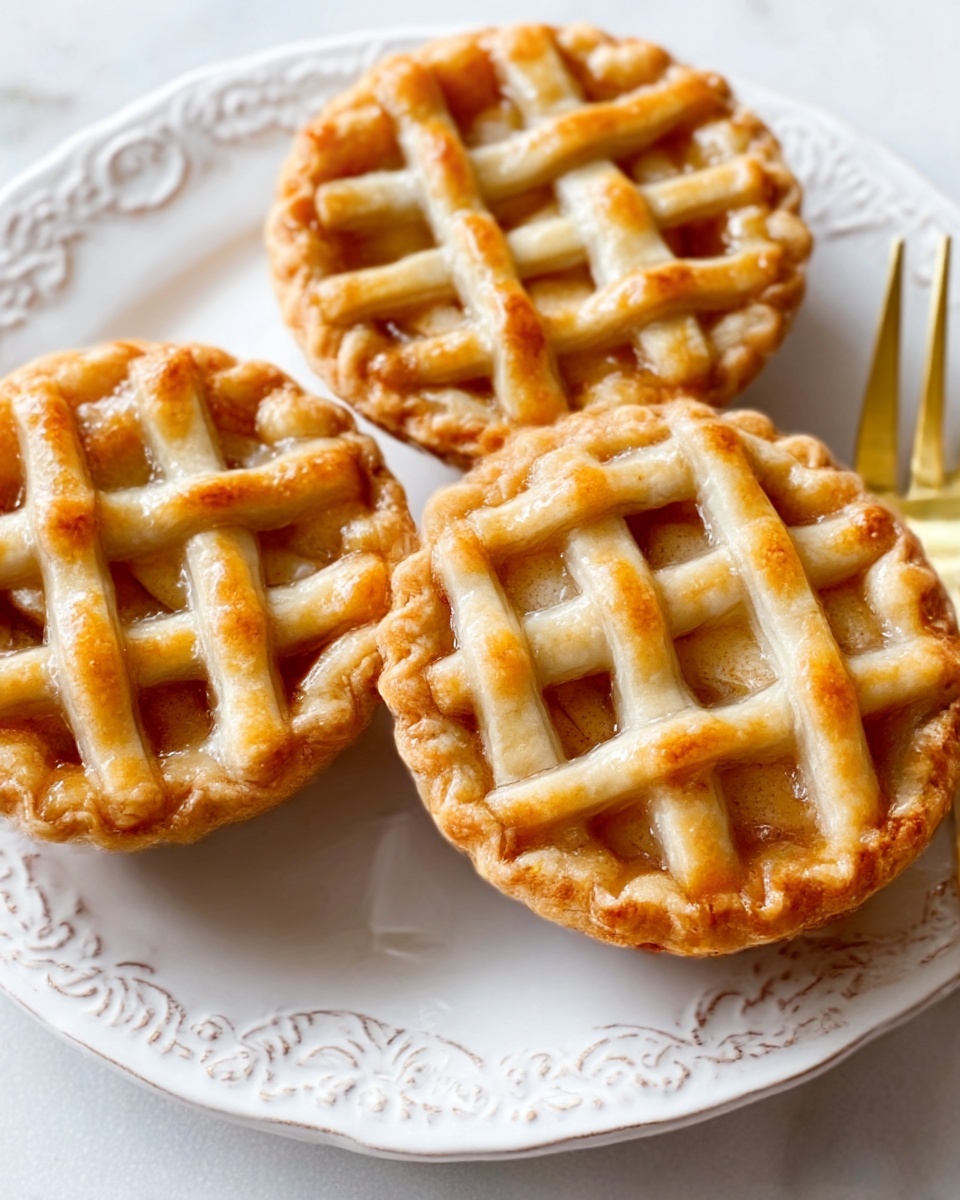
If you’ve ever dreamed of holding a delicious slice of classic apple pie in the palm of your hand, let me introduce you to the irresistible world of the Mini Apple Pies in Muffin Tins Recipe. These charming little pies are packed with tender, cinnamon-spiced apples and wrapped in a perfectly flaky crust, all baked right in a muffin tin for individual servings that are as adorable as they are delicious. This recipe brings warm nostalgia and pure comfort in every bite, making it perfect for family gatherings, cozy afternoons, or whenever you crave a homemade sweet treat that’s easy to share.
Ingredients You’ll Need
Getting the ingredients right is the secret to these darling mini pies. Each element plays its role in crafting that satisfying balance of flavor and texture. From the buttery pie crust that gives each pie its golden shell to the fragrant spices that make the apples irresistible, these simple ingredients come together beautifully.
- 2 pie crusts (homemade or store-bought): The foundation for your pies, providing a flaky, buttery casing.
- 2 ½ cups chopped apples (315 grams): Choose crisp apples like Granny Smith for the best texture and tartness.
- ¼ cup granulated sugar (50 grams): Sweetens the fruit filling just enough to complement the spices.
- 2 tablespoons all-purpose flour (15 grams): Helps thicken the apple filling as it bakes.
- 1 teaspoon ground cinnamon: Adds warmth and depth of flavor to the filling.
- 1 teaspoon pure vanilla extract: Elevates the filling with a subtle, sweet aroma.
- ⅛ teaspoon ground nutmeg: Offers a delicate spice note that rounds out the apple mixture.
- 1 tablespoon unsalted butter (15 grams), optional: Adds richness when placed on top of the filling before baking.
How to Make Mini Apple Pies in Muffin Tins Recipe
Step 1: Prepare the Oven and Your Tools
Start by preheating your oven to 425°F (220°C). It’s a good idea to lightly flour your work surface to keep the pie crust from sticking when you roll it out. Having your tools ready upfront saves time and keeps everything running smoothly.
Step 2: Roll and Cut the Pie Crust
Roll out your pie crusts to about 1/8-inch thickness—thin enough for a crisp bite but sturdy enough to hold the filling. Use a 3.5-inch cookie cutter or a cup to cut out 12 circles. If you have scraps, don’t waste them; re-roll the dough carefully to get the remaining circles you need.
Step 3: Shape the Mini Pie Shells
Gently place each dough circle into the cavities of a standard 12-count muffin pan. Press lightly so the dough molds snugly to each cup’s shape. Once all circles are fitted, pop the pan in the refrigerator to keep the crust chilled while you prepare your filling—this helps maintain flakiness during baking.
Step 4: Prepare the Apple Filling
Next, mix the chopped apples with granulated sugar, flour, cinnamon, vanilla extract, and nutmeg until each apple piece is coated in sweet, spicy goodness. This filling is packed with classic apple pie flavor but perfectly suited for smaller, individual pies.
Step 5: Fill the Pie Shells
Take the muffin pan out of the fridge and spoon roughly 3 tablespoons of the apple filling into each dough-lined cup. Even filling ensures every mini pie bursts with flavor in every bite.
Step 6: Add Butter
If you’re using butter, dice it into 12 small bits and place one piece atop the filling in each pie cup. This little touch adds an indulgent richness and helps the filling bubble beautifully under the crust.
Step 7: Top the Pies
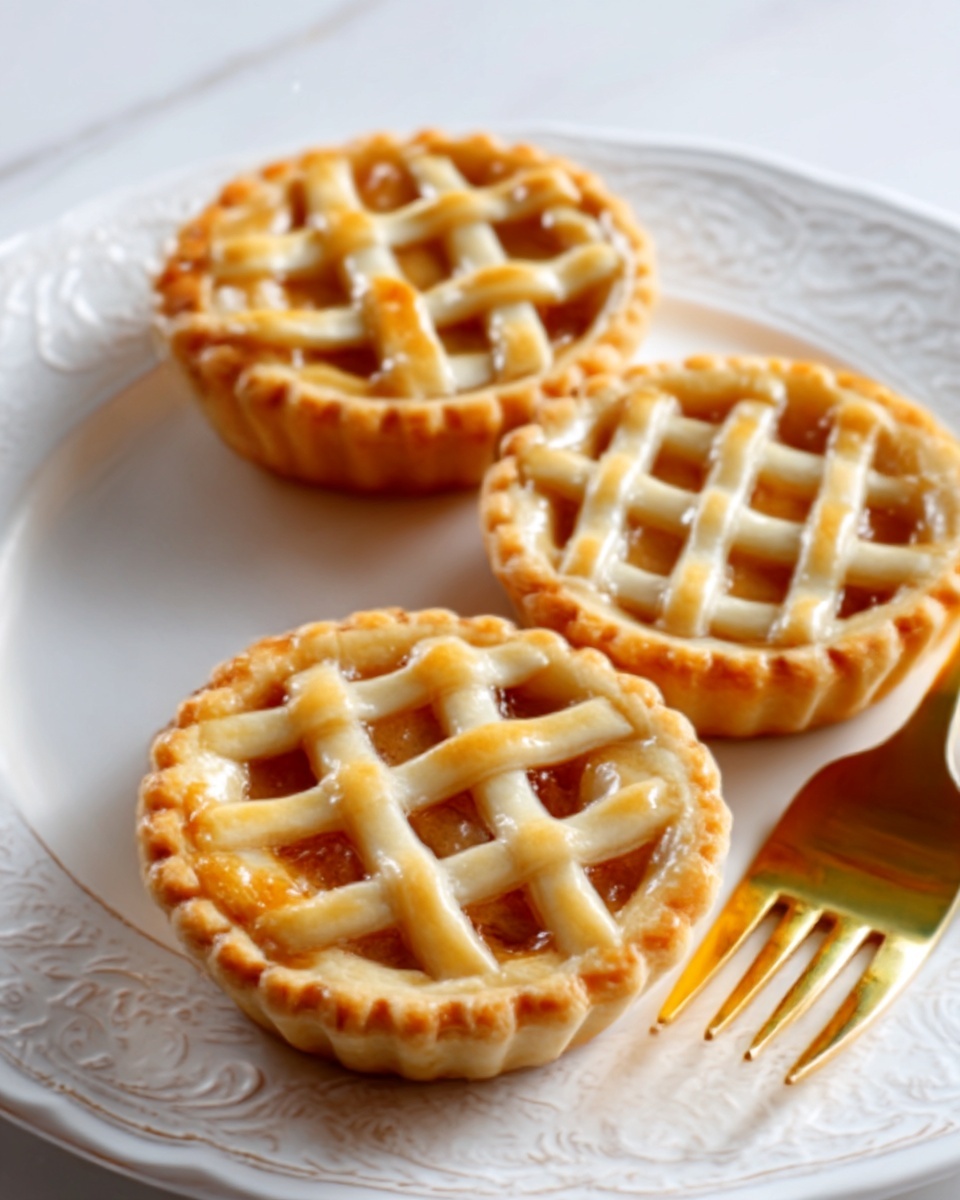
With any leftover pie crust, cut out decorative shapes or thin lattice strips to place on top of each mini pie. This gives your pies a lovely, homemade appearance and lets steam escape for a perfectly baked filling.
Step 8: Bake and Cool
Bake these delightful pies in the preheated oven for 18 to 23 minutes, or until the crusts turn golden brown and the filling is deliciously bubbly. Once baked, allow them to cool in the pan for 10 to 15 minutes before gently removing and transferring to a wire rack to finish cooling. This ensures the filling sets nicely without losing warmth.
How to Serve Mini Apple Pies in Muffin Tins Recipe
Garnishes
Mini Apple Pies in Muffin Tins Recipe shine when garnished with a scoop of vanilla ice cream or a drizzle of caramel sauce. A dusting of powdered sugar or a sprinkle of chopped nuts can also add a lovely finishing touch and texture contrast.
Side Dishes
Pair these mini pies with a cozy cup of hot coffee or spiced chai tea for an afternoon treat. For a fuller dessert spread, serve alongside whipped cream or a light custard to complement the spiced apple filling.
Creative Ways to Present
Impress your guests by serving Mini Apple Pies in Muffin Tins Recipe on a rustic wooden board with fresh autumn leaves or a handful of cinnamon sticks nearby. You can also present them in individual ramekins or wrap each pie with a cinnamon stick tied around it for a charming touch.
Make Ahead and Storage
Storing Leftovers
If you have any leftovers, store the mini pies in an airtight container in the refrigerator. They remain moist and flavorful for up to 3 days, making them perfect for a quick snack or dessert the next day.
Freezing
These mini pies freeze beautifully. Wrap each pie individually in plastic wrap and then place them in a freezer bag or container. They can be frozen for up to 2 months and thawed overnight in the refrigerator before reheating.
Reheating
To bring back that fresh-baked feel, warm your mini pies in a 350°F (175°C) oven for 10 to 15 minutes. This restores crispness to the crust and heats the filling evenly without drying out the pies.
FAQs
Can I use different types of apples for the Mini Apple Pies in Muffin Tins Recipe?
Absolutely! While Granny Smith apples provide the perfect balance of tartness and firmness, you can experiment with varieties like Honeycrisp or Fuji for a sweeter or softer filling. Just keep in mind the texture as some apples may become mushier when baked.
Do I need to blind bake the crust for this recipe?
No need to blind bake. Because the pies are small and filled with a thick filling, baking them all together in the muffin tin ensures the crust cooks evenly without getting soggy.
Can I prepare the mini pies in advance?
Yes! You can assemble the pies up to the baking stage and refrigerate them overnight. Just cover the muffin tin tightly with plastic wrap and bake them fresh the next day for the best texture and flavor.
Is it possible to make these pies gluten-free?
Definitely. Substitute the pie crust and flour with your favorite gluten-free alternatives, making sure they behave similarly to traditional dough and flour for the best results.
How do I prevent the crust from becoming soggy?
Keeping the dough chilled before baking, using flour in the filling to thicken juices, and baking at a high enough temperature all help keep the crust nice and flaky without turning soggy.
Final Thoughts
The Mini Apple Pies in Muffin Tins Recipe is one of those magical treats that brings joy with every bite. Whether you’re baking for family, friends, or just indulging yourself, these darling little pies are easy to make, delightful to eat, and perfect for any occasion. So grab your muffin tin and pie crust, and start creating your own batch of happiness today!
Print
Mini Apple Pies in Muffin Tins Recipe
- Prep Time: 20 minutes
- Cook Time: 23 minutes
- Total Time: 43 minutes
- Yield: 12 mini apple pies
- Category: Dessert
- Method: Baking
- Cuisine: American
Description
These Mini Apple Pies are a delightful treat featuring tender, cinnamon-spiced apples encased in flaky pie crusts. Perfect for individual servings, they offer a charming presentation and the comforting flavors of a classic apple pie, baked to golden perfection in a muffin pan.
Ingredients
Pie Crust
- 2 pie crusts (homemade or store-bought)
Apple Filling
- 2 ½ cups chopped apples (315 grams)
- ¼ cup granulated sugar (50 grams)
- 2 tablespoons all-purpose flour (15 grams)
- 1 teaspoon ground cinnamon
- 1 teaspoon pure vanilla extract
- ⅛ teaspoon ground nutmeg
Toppings
- 1 tablespoon unsalted butter (15 grams), optional
Instructions
- Prepare the Oven and Your Tools: Preheat your oven to 425°F (220°C) and lightly flour your work surface to prevent the dough from sticking.
- Roll and Cut the Pie Crust: Roll the pie crusts out to about 1/8-inch thickness. Using a 3.5-inch cookie cutter or a cup, cut out 12 circles. Re-roll any leftover dough to get all circles needed.
- Shape the Mini Pie Shells: Place each dough circle into the cavity of a standard 12-count muffin pan, pressing gently to ensure the dough fits snugly. Put the pan and any leftover crust in the refrigerator while you prepare the filling.
- Prepare the Apple Filling: In a large mixing bowl, combine the chopped apples, granulated sugar, all-purpose flour, ground cinnamon, pure vanilla extract, and ground nutmeg. Stir thoroughly until the apples are well coated with the mixture.
- Fill the Pie Shells: Remove the muffin pan from the refrigerator and evenly distribute about 3 tablespoons of apple filling into each dough-lined muffin cup.
- Add Butter: Dice the unsalted butter into 12 small pieces and place one piece on top of the filling in each mini pie, if using.
- Top the Pies: Remove the extra pie crust from the fridge, cut out small decorative shapes or lattice strips, and place them over the top of each mini pie for decoration.
- Bake: Place the muffin pan in the preheated oven and bake for 18 to 23 minutes, or until the crusts are golden brown and the filling is bubbling.
- Cool: Remove the muffin pan from the oven and let the pies cool for 10 to 15 minutes. Carefully lift each mini pie out and transfer to a wire rack to cool completely before serving.
Notes
- Use tart apples like Granny Smith or Honeycrisp for best flavor and texture.
- You can prepare the mini pies ahead of time and freeze them before baking for a quick dessert later.
- To avoid soggy bottoms, you can blind bake the crusts for 5 minutes before adding the filling.
- Adjust the amount of sugar based on the sweetness of your apples.
- Butter on top helps create a richer, golden finish on each mini pie.


