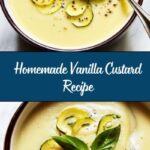
If you’ve ever dreamed of creating a silky, rich dessert that feels like a warm hug on a spoon, look no further than this Homemade Vanilla Custard Recipe. It’s that perfect balance of creamy, sweet, and fragrant vanilla that makes every bite utterly irresistible. Whether you’re a seasoned baker or a curious beginner, this recipe will guide you through making a custard that’s smooth, luscious, and delightfully homemade — a true classic that elevates any dessert experience.
Ingredients You’ll Need
These ingredients are incredibly simple yet vital in delivering that perfect custard’s texture, flavor, and color. Each one plays a pivotal role, from the creamy whole milk to the aromatic vanilla extract.
- 2 cups whole milk: Provides the creamy base that gives custard its rich texture.
- 1/2 cup granulated sugar: Sweetens the custard perfectly without overpowering the vanilla.
- 4 large egg yolks: The heart of the custard, adding body and silky smoothness.
- 2 tablespoons cornstarch: Helps thicken the custard to that signature velvety consistency.
- 1 tablespoon unsalted butter: Adds a glossy finish and smooth richness.
- 1 1/2 teaspoons pure vanilla extract: Infuses the custard with a warm, comforting vanilla aroma.
- 1 pinch salt: Balances the sweetness and enhances all the flavors.
How to Make Homemade Vanilla Custard Recipe
Step 1: Warm the Milk
Begin by gently warming the whole milk in a heavy-bottomed saucepan over medium heat until it starts to steam. This helps infuse the milk with subtle warmth, preparing it for the next steps. Remember not to let it boil — just a gentle heat is what you want here.
Step 2: Whisk Together Egg Yolks and Dry Ingredients
While the milk is warming, whisk the egg yolks, granulated sugar, cornstarch, and a pinch of salt in a bowl until the mixture is pale and slightly thickened. This mixture will be the base and thickening powerhouse of your custard.
Step 3: Temper the Eggs
To avoid curdling, slowly add about half a cup of the warm milk into the yolk mixture while whisking constantly. This gentle warming prepares the eggs to combine smoothly without scrambling.
Step 4: Combine and Return to Heat
Gradually add the remaining warm milk to the egg mixture, whisking continuously. Then, pour the entire mixture back into the saucepan, setting the stage for the crucial thickening process.
Step 5: Cook Until Thickened
Place the saucepan over low to medium heat and stir constantly. This stirring not only prevents lumps but also brings the custard slowly to the perfect thickness, where it coats the back of a spoon like liquid silk.
Step 6: Add Butter and Vanilla
Once thickened, remove the custard from the heat and stir in the unsalted butter and pure vanilla extract. These final touches enrich the flavor profile and give the custard a glossy, irresistible finish.
Step 7: Strain and Chill
For the smoothest texture, strain your custard through a fine-mesh sieve into a clean bowl. Then press plastic wrap directly onto its surface to prevent a skin from forming as it cools to room temperature before refrigerating.
Step 8: Serve and Enjoy
Once chilled or slightly warmed, your Homemade Vanilla Custard Recipe is ready to be enjoyed. It’s decadent and comforting, making it a true crowd-pleaser.
How to Serve Homemade Vanilla Custard Recipe

Garnishes
A sprinkle of freshly grated nutmeg or a few fresh berries perfectly complement the creamy custard, adding a burst of aroma or brightness. Whipped cream or a dusting of cinnamon can also elevate this humble treat into something special.
Side Dishes
This custard pairs beautifully with warm fruit pies, tarts, or simple pound cake slices. It’s also divine alongside poached pears or caramelized bananas, bringing a silky contrast to those tender fruits.
Creative Ways to Present
Try layering your custard in clear glasses with fresh fruit and crushed cookies for an elegant parfait. Or spoon it into ramekins and use it as a base for a baked custard dessert topped with caramelized sugar for a homemade crème brûlée twist.
Make Ahead and Storage
Storing Leftovers
Your leftover Homemade Vanilla Custard Recipe keeps beautifully in the refrigerator for up to three days. Keep it covered tightly with plastic wrap pressed directly onto the surface to maintain its smooth texture.
Freezing
Freezing custard isn’t ideal as it can alter the texture, causing separation or graininess when thawed. If you must freeze, do so in an airtight container and be prepared for subtle changes.
Reheating
If you prefer warm custard, gently reheat it over low heat while stirring constantly. This cautious approach keeps the custard silky without scrambling the eggs or losing its luscious texture.
FAQs
Can I use milk alternatives to make this Homemade Vanilla Custard Recipe?
While whole milk delivers the creamiest texture, you can experiment with milk alternatives like almond or oat milk, but be aware the custard may have a lighter texture and a slightly different flavor profile.
How do I know when the custard is perfectly cooked?
The custard is ready when it thickly coats the back of a spoon and you can draw a line with your finger through the coating without it running back. This classic test ensures it’s cooked just right to silky perfection.
Why is cornstarch used in this recipe?
Cornstarch helps thicken the custard quickly and gives it a smooth, velvety texture without the heaviness that sometimes comes with more egg yolks. It’s an essential ingredient to balance richness and creaminess.
Can I make this custard vegan?
This traditional recipe relies on dairy and eggs for its texture and flavor, so a vegan version would require substitutions like plant-based milks and thickening agents, but that would stray from this classic Homemade Vanilla Custard Recipe experience.
What is the best way to avoid lumps in my custard?
Constant stirring, tempering the eggs with warm milk, and straining the custard after cooking are key steps to achieving a lump-free, smooth custard. Patience and gentle heat are your best friends here.
Final Thoughts
There’s something truly magical about crafting your own Homemade Vanilla Custard Recipe from scratch, and once you taste this silky, fragrant custard, it’s hard to go back to store-bought versions. Give it a try and watch how it transforms everyday desserts into moments of pure indulgence and comfort.
Print
Homemade Vanilla Custard Recipe
- Prep Time: 10 minutes
- Cook Time: 15 minutes
- Total Time: 25 minutes
- Yield: 4 servings
- Category: Dessert
- Method: Stovetop
- Cuisine: American
Description
This homemade vanilla custard recipe is a creamy, rich dessert made with simple ingredients like whole milk, egg yolks, sugar, and vanilla extract. It is gently cooked on the stovetop until thickened, then chilled to perfection. Perfect as a base for many desserts or served on its own with a smooth, velvety texture and classic vanilla flavor.
Ingredients
Custard Base
- 2 cups whole milk
- 1/2 cup granulated sugar
- 4 large egg yolks
- 2 tablespoons cornstarch
- 1 pinch salt
Finishing Ingredients
- 1 tablespoon unsalted butter
- 1 1/2 teaspoons pure vanilla extract
Instructions
- Warm the Milk: In a heavy-bottomed saucepan, warm the milk over medium heat until it begins to steam but does not boil. Remove from heat to prevent scorching.
- Prepare Egg Mixture: In a separate bowl, whisk together the egg yolks, granulated sugar, cornstarch, and salt until the mixture is pale and slightly thickened, incorporating air for a lighter texture.
- Temper the Eggs: Gradually pour 1/2 cup of the warm milk into the egg mixture while whisking constantly. This step is crucial to prevent the eggs from curdling by gently raising their temperature.
- Combine Mixtures: Slowly whisk in the remaining warm milk, then pour the entire mixture back into the saucepan, preparing for cooking.
- Cook the Custard: Cook over low to medium heat, stirring constantly with a wooden spoon or heatproof spatula, until the custard thickens and coats the back of a spoon, ensuring it does not boil to avoid curdling.
- Add Butter and Vanilla: Remove the saucepan from heat and immediately stir in the unsalted butter and pure vanilla extract until the custard is smooth and glossy.
- Strain for Smoothness: Pour the custard through a fine-mesh sieve into a clean bowl to remove any lumps and achieve a silky texture.
- Cool and Refrigerate: Press plastic wrap directly onto the surface of the custard to prevent a skin from forming. Let it cool at room temperature, then refrigerate for at least 2 hours until chilled and set.
- Serve: Serve the custard chilled or slightly warmed, garnished with fresh fruit, a sprinkle of cinnamon, or your favorite toppings.
Notes
- Be sure to whisk constantly while cooking to prevent the custard from sticking or forming lumps.
- Using a heavy-bottomed saucepan helps distribute heat more evenly, reducing the risk of burning.
- The custard will thicken more as it chills, so slightly thinner consistency when warm is ideal.
- For a dairy-free version, substitute milk with almond or coconut milk and butter with a plant-based alternative.
- Store leftovers in an airtight container in the refrigerator for up to 3 days.

