
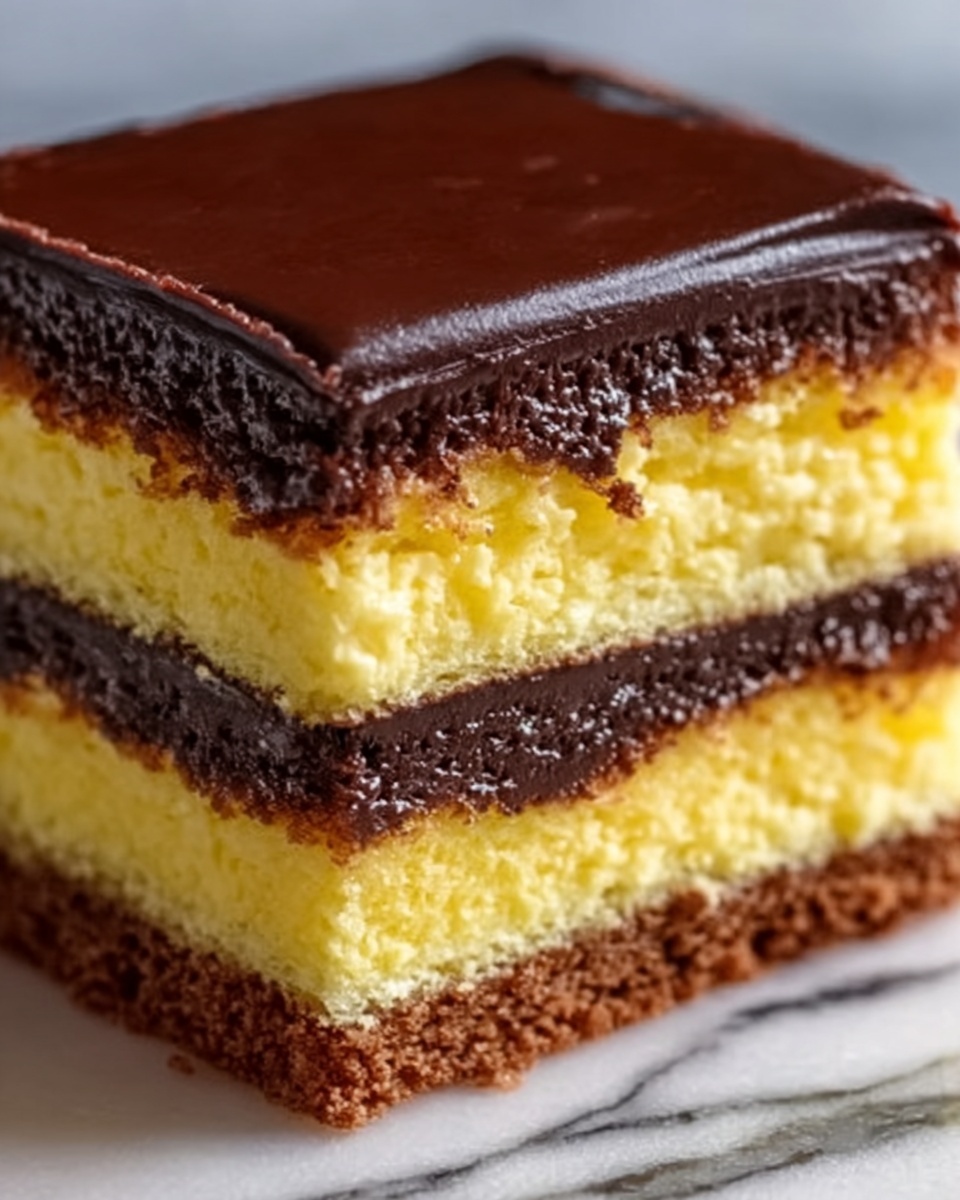
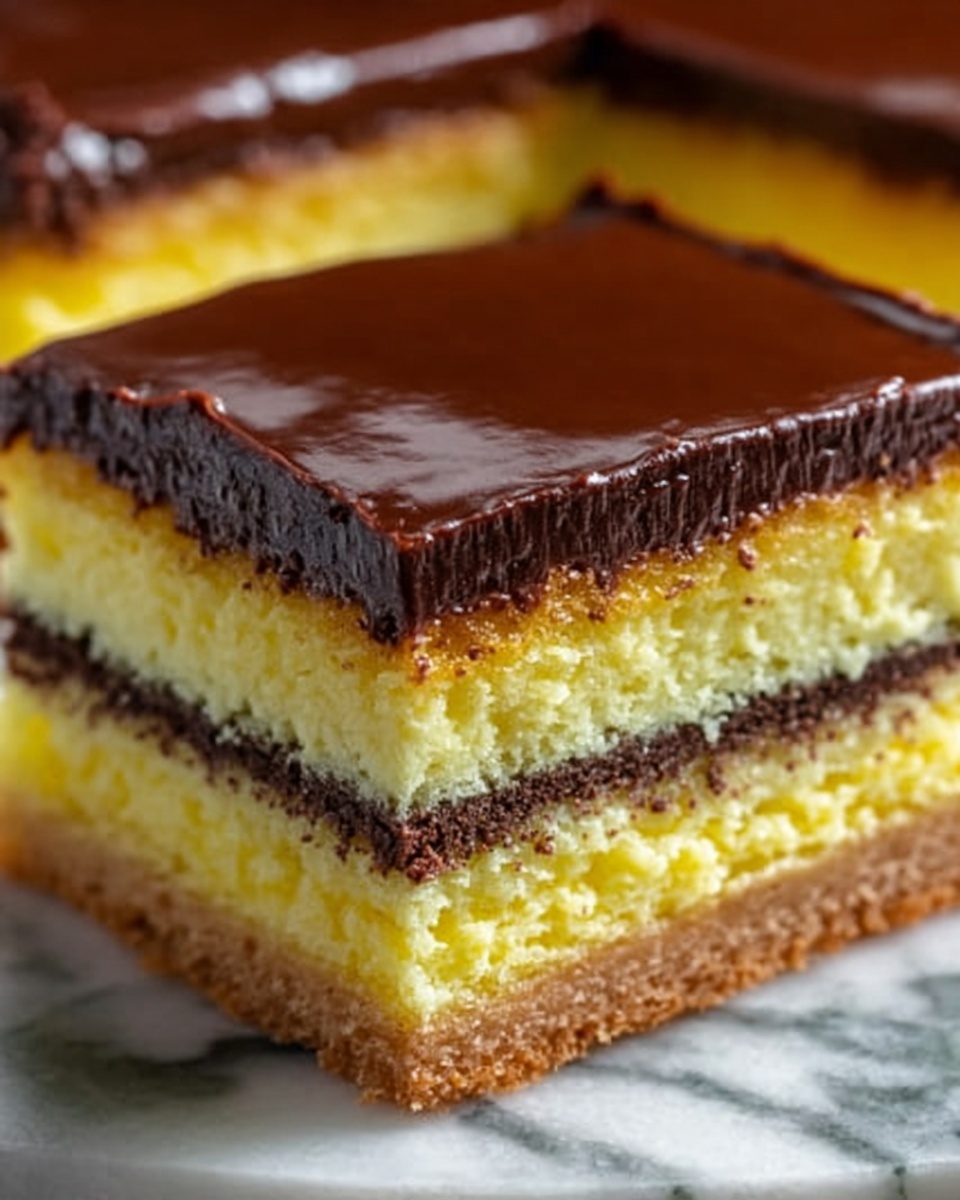
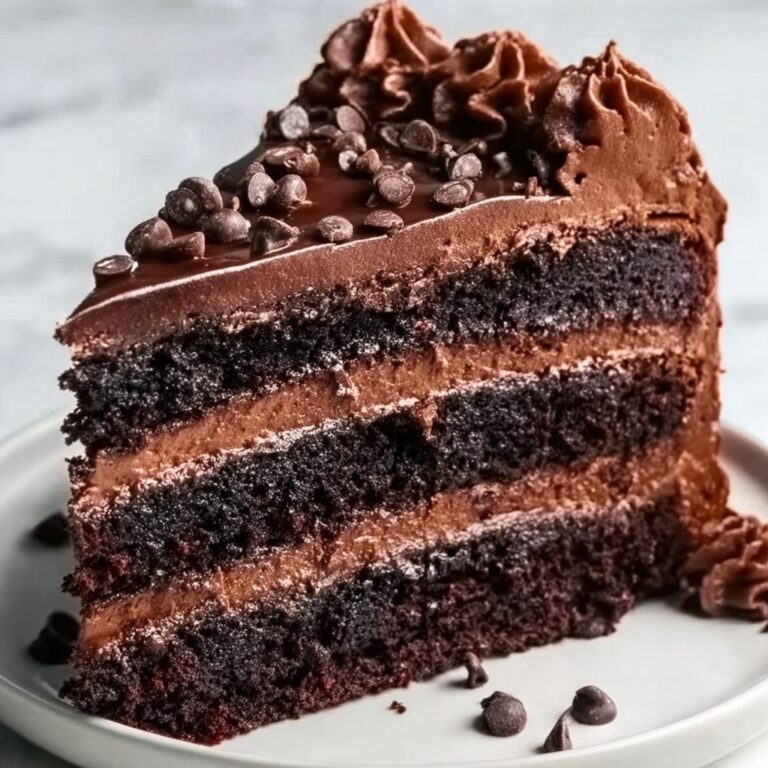
If you have a soft spot for vintage desserts with rich flavors and a comforting texture, this Classic Boston Cream Pie Recipe will quickly become your new favorite. Despite its name, this delightful treat is actually a cake layered with luscious pastry cream and finished with a glossy chocolate glaze, making it a perfect harmony of moist cake, creamy filling, and rich chocolate on top. It is a timeless dessert that brings a sense of nostalgia and a celebration-worthy finish to any meal.
Ingredients You’ll Need
The beauty of the Classic Boston Cream Pie Recipe lies in its simple, classic ingredients that work together to create something truly special. Each component plays a crucial role: the cake provides a tender base, the pastry cream adds smooth richness, and the chocolate glaze offers the perfect finishing touch.
- 1 cup all-purpose flour: The foundation for the cake’s tender crumb and soft texture.
- 1 1/2 teaspoons baking powder: Helps the cake rise beautifully, keeping it light and fluffy.
- 1/2 teaspoon salt: Balances the sweetness and enhances overall flavor.
- 1/2 cup unsalted butter, softened: Adds moisture and richness without overpowering flavor.
- 1 cup granulated sugar: Sweetens the cake evenly and helps with browning.
- 2 large eggs: Bind everything together and contribute to the cake’s structure.
- Pastry cream or custard: The velvety filling that makes this dessert unforgettable.
- Chocolate glaze: A glossy, decadent layer that’s the perfect finishing splash of indulgence.
How to Make Classic Boston Cream Pie Recipe
Step 1: Prep Your Pans and Preheat
Start by preheating your oven to 350°F (175°C). Grease and flour two 9-inch round cake pans so your cakes come out cleanly and with perfectly smooth edges. This little prep ensures an easy release and a professional finish.
Step 2: Mix Dry Ingredients
In a medium bowl, whisk together the flour, baking powder, and salt. This step is crucial to evenly distribute the leavening agent and salt throughout the batter, guaranteeing a uniform rise and well-rounded flavor.
Step 3: Cream Butter and Sugar
In a separate large bowl, beat the softened butter and granulated sugar together until light and fluffy. This aeration is the secret behind the cake’s delicate crumb and tender bite—don’t rush this step!
Step 4: Add Eggs Gradually
Add eggs one at a time to the butter-sugar mixture, beating well after each addition. This gentle incorporation helps create a smooth batter that traps air for a lighter cake.
Step 5: Combine Wet and Dry Ingredients
Gradually add the dry ingredient mixture to the wet ingredients, mixing just until combined. Overmixing can toughen the cake, so pause as soon as the flour disappears to keep the texture tender and moist.
Step 6: Bake the Cake Layers
Pour the batter evenly into the prepared pans and smooth the tops with a spatula. Bake for 20-25 minutes or until a toothpick inserted in the center comes out clean. This step gives you two light and golden cake layers, ready to assemble your dessert.
Step 7: Cool and Assemble
Let the cakes cool in the pans for about 10 minutes, then transfer them to a wire rack to cool completely. Once cool, spread a generous layer of pastry cream or custard between the two cake layers. This filling is where the magic happens—creamy, smooth, and utterly irresistible.
Step 8: Add the Chocolate Glaze
Finish the Cake by topping it with a rich, glossy chocolate glaze that will harden slightly to create that signature shine and slight snap. This glaze balances perfectly with the creamy center and delicate cake, elevating this Classic Boston Cream Pie Recipe to a show-stopper.
How to Serve Classic Boston Cream Pie Recipe
Garnishes
Think light and elegant. A few fresh berries or a dusting of powdered sugar on the cake plate add an inviting touch without overshadowing the dessert’s classic charm. Mint leaves can add a lovely pop of green and a fresh note that pairs beautifully with the rich flavors.
Side Dishes
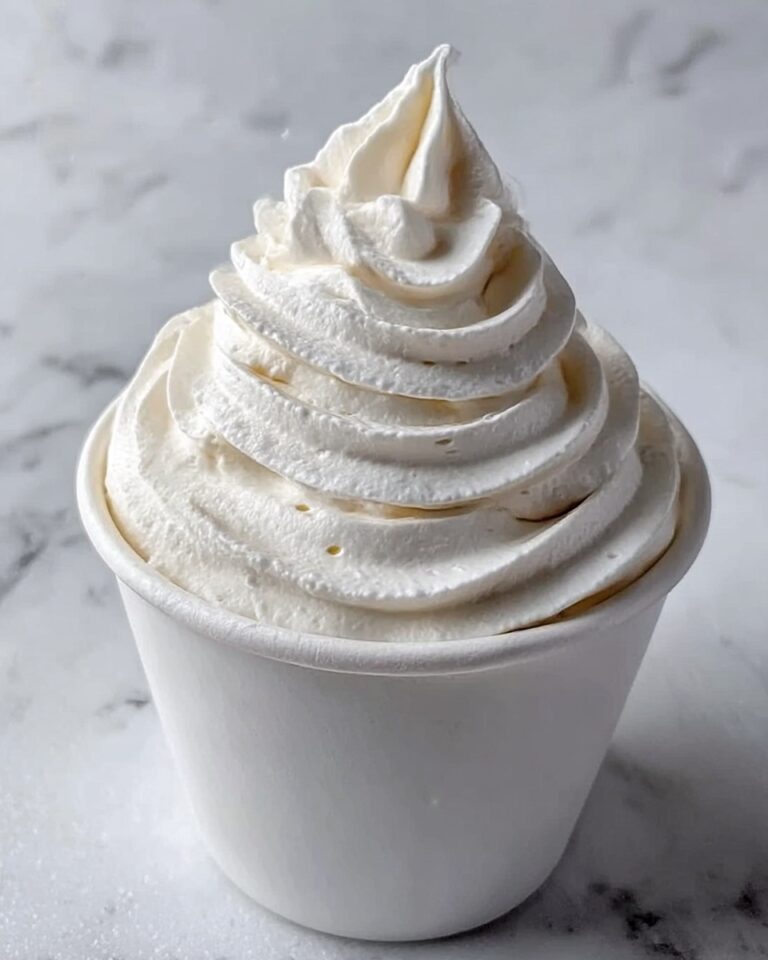
This dessert shines on its own, but if you want to round out your presentation, consider a scoop of vanilla bean ice cream or a dollop of freshly whipped cream. Both complement the creamy pastry filling and chocolate topping without competing for attention.
Creative Ways to Present
For a fun twist, serve the Classic Boston Cream Pie Recipe as individual parfaits by layering cake cubes, pastry cream, and chocolate ganache in pretty glass cups. This not only makes for a beautiful presentation but also gives each guest the ultimate personal indulgence.
Make Ahead and Storage
Storing Leftovers
Leftover Boston Cream Pie is best stored in the refrigerator, covered tightly with plastic wrap or in an airtight container. This helps the layers stay moist and prevents the chocolate glaze from drying out. It will keep well for up to three days, making it a great make-ahead dessert.
Freezing
You can freeze this cake, but it’s best to freeze the cake layers separately before assembling. Wrap each layer individually in plastic wrap and then foil to protect them from freezer burn. When you’re ready to serve, thaw completely and then fill and glaze for the freshest taste and texture.
Reheating
Since this cake is served chilled, reheating is usually not necessary. If you find the pastry cream is too cold, simply let the cake sit out at room temperature for 20-30 minutes before serving to let the flavors mellow and the cream soften slightly.
FAQs
What makes Boston Cream Pie different from regular cake?
Boston Cream Pie is actually a cake composed of two layers filled with pastry cream and topped with chocolate glaze. The combination of creamy custard and chocolate sets it apart from typical frosted cakes.
Can I use store-bought pastry cream?
Absolutely! Using store-bought pastry cream can save time and still deliver that luscious, velvety texture that makes this Classic Boston Cream Pie Recipe so irresistible.
What kind of chocolate works best for the glaze?
Semi-sweet or bittersweet chocolate is ideal for the glaze because it balances the sweetness of the cake and custard without being overpowering.
How do I prevent the cake from drying out?
Be careful not to overbake the layers and store the assembled cake in an airtight container in the fridge to keep it moist and tender.
Can I make this recipe gluten-free?
Yes! Substitute the all-purpose flour with a gluten-free blend suitable for baking. Make sure your baking powder is also gluten-free to avoid any surprises.
Final Thoughts
This Classic Boston Cream Pie Recipe is more than just a dessert — it’s a delightful chance to bring a little bit of history and immense joy to your table. Whether you’re serving it for a special occasion or simply treating yourself, its perfect balance of cake, custard, and chocolate is always a crowd-pleaser. Give it a try, and prepare to win hearts with every slice!
Print
Classic Boston Cream Pie Recipe
- Prep Time: 15 minutes
- Cook Time: 25 minutes
- Total Time: 45 minutes
- Yield: 8 servings
- Category: Dessert
- Method: Baking
- Cuisine: American
Description
This Classic Boston Cream Pie recipe features layers of moist vanilla cake filled with smooth pastry cream and topped with a luscious chocolate glaze. Perfectly balanced and indulgent, it’s a timeless dessert that’s sure to impress.
Ingredients
Cake Ingredients
- 1 cup all-purpose flour
- 1 1/2 teaspoons baking powder
- 1/2 teaspoon salt
- 1/2 cup unsalted butter, softened
- 1 cup granulated sugar
- 2 large eggs
Filling
- Pastry cream or custard (about 1 cup)
Chocolate Glaze
- Rich chocolate glaze (quantity as needed to cover the cake)
Instructions
- Preheat and Prepare Pans: Preheat your oven to 350°F (175°C). Grease and flour two 9-inch round cake pans to prevent sticking.
- Mix Dry Ingredients: In a medium bowl, whisk together the all-purpose flour, baking powder, and salt. Set this mixture aside for later use.
- Cream Butter and Sugar: In a large bowl, beat the softened unsalted butter and granulated sugar together until the mixture becomes light and fluffy, ensuring a good texture for the cake.
- Add Eggs: Add the eggs to the butter-sugar mixture one at a time, beating well after each addition to fully incorporate and create a smooth batter.
- Combine Dry and Wet Ingredients: Gradually add the dry flour mixture to the wet ingredients, mixing gently until just combined to avoid overmixing, which could toughen the cake.
- Pour Batter and Bake: Evenly divide the batter between the two prepared cake pans, smoothing the tops with a spatula. Bake in the preheated oven for 20-25 minutes or until a toothpick inserted into the center comes out clean.
- Cool Cakes: Allow the cakes to cool in their pans for 10 minutes before transferring them to a wire rack to cool completely, which ensures the cakes do not become soggy when layered.
- Assemble the Cake: Once fully cooled, spread a generous layer of pastry cream or custard on top of one cake layer. Carefully place the second cake layer on top.
- Add Chocolate Glaze: Finish by pouring a rich chocolate glaze over the top of the assembled cake, spreading it evenly to cover the surface.
- Chill and Serve: Refrigerate the cake until the glaze is set and the dessert is chilled. Serve cold for the best texture and flavor.
Notes
- Ensure cakes are completely cooled before adding pastry cream to prevent melting or sliding.
- Use homemade or store-bought pastry cream according to your preference.
- For a smoother chocolate glaze, warm the chocolate slightly before spreading.
- This cake is best served chilled but can be brought to room temperature before serving if preferred.
- Store the cake covered in the refrigerator for up to 3 days for optimal freshness.

