
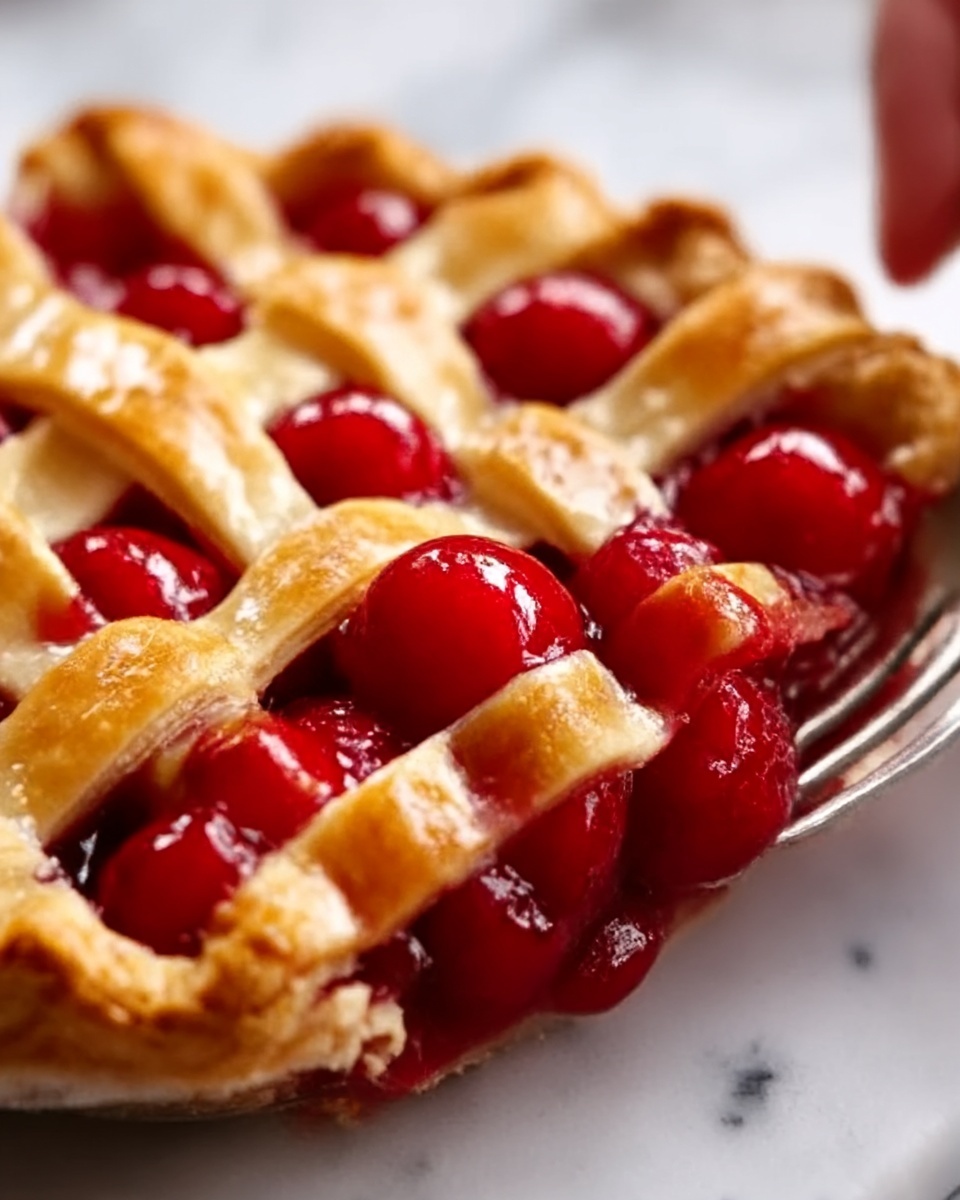
If you’re on the hunt for that perfect summer treat bursting with vibrant flavors and a stunning homemade look, this Fresh Cherry Pie with Lattice Crust Recipe is your new best friend. Imagine biting into a flaky, buttery crust woven in a beautiful lattice pattern, giving way to a luscious, sweet-tart cherry filling that’s both comforting and unforgettable. This pie isn’t just dessert; it’s a celebration of fresh cherries, simple ingredients, and the joy of baking from scratch. Whether it’s a family gathering or a quiet weekend indulgence, this cherry pie promises to brighten any occasion with its irresistible charm.
Ingredients You’ll Need
Getting ready to bake this classic pie? You’ll find that the magic lies in a handful of simple, everyday ingredients that combine to create spectacular texture, taste, and that gorgeous pop of color.
- 2 1/2 cups all-purpose flour: The foundation for our tender, flaky crust that holds everything beautifully.
- 1 teaspoon salt: Enhances all the flavors, balancing sweetness with a subtle savory note.
- 1 tablespoon sugar: Just enough to sweeten the crust without overpowering the cherries.
- 1 cup unsalted butter, cold and cubed: This is what makes the crust buttery and flaky—cold butter is key!
- 1/4 cup ice water: Helps bring the dough together without warming the butter, keeping that flakiness intact.
- 4 cups fresh or frozen pitted cherries: The star ingredient—juicy, colorful, and full of natural sweetness and tartness.
- 3/4 cup granulated sugar: Perfectly amounts the sweetness for the filling, but feel free to tweak it based on your cherries.
- 2 tablespoons cornstarch: Thickens the cherry juices into a luscious, sliceable filling without cloudiness.
- 1 tablespoon lemon juice: Brightens the filling and balances the sweetness with a hint of tang.
- 1/4 teaspoon almond extract (optional): Adds a subtle nutty aroma that pairs beautifully with cherries.
- 1/4 teaspoon vanilla extract: Rounds out the flavor for a more complex and inviting taste.
- Pinch of salt: Elevates the depth of flavors in the cherry filling just like in the crust.
- 1 tablespoon heavy cream or milk: Brushed on top to make the crust golden and give it a lovely sheen.
- 1 tablespoon coarse sugar: Sprinkled on top for a little sparkle and sweet crunch after baking.
How to Make Fresh Cherry Pie with Lattice Crust Recipe
Step 1: Craft the Perfect Pie Crust
Begin by mixing flour, salt, and sugar in a big bowl — these three simple ingredients create the base for that flaky texture we’re after. Then, incorporate the cold butter cubes, breaking them down with a pastry cutter or your fingers until the mixture looks like coarse crumbs. The key here is to keep everything cold and not over-mix, so you retain those lovely butter pockets that bake into flakiness.
Step 2: Bring the Dough Together
Slowly add the ice water, one tablespoon at a time, stirring gently with a fork until the dough just starts to come together. Too much water can make the crust tough, so be cautious. Once it holds, divide the dough into two discs, wrap tightly in plastic, and pop them in the fridge for at least 30 minutes. This chilling step helps the dough relax and keeps it cold for rolling out.
Step 3: Prepare the Cherry Filling
While the dough chills, it’s time to turn those cherries into the star of the show. Toss the cherries, sugar, cornstarch, lemon juice, almond extract, vanilla, and a pinch of salt in a saucepan. Cook the mix over medium heat, stirring constantly until the cherries release their juices and the filling thickens nicely—about five to seven minutes. Let it cool while you get your dough ready for assembly.
Step 4: Roll and Assemble the Pie
Preheat your oven to 375°F (190°C). Roll out one dough disc on a lightly floured surface to fit your 9-inch pie dish. Gently lift it into the dish, pressing into the edges with care. Pour in the cooled cherry filling, spreading it evenly. For the signature lattice crust, roll out the second disc and slice it into strips. Lay the strips in a neat criss-cross pattern on top, trimming and crimping the edges to seal your beautiful work of edible art. If lattice isn’t your style, use the whole disc as a top crust, cut a few slits for venting, and seal the edges.
Step 5: Add the Finishing Touches and Bake
Brush the top crust with a little heavy cream or milk to get that gorgeous golden color once baked. Sprinkle with coarse sugar to add a subtle crunch and sparkle. Place your pie on a baking sheet to catch any drips, then bake for 45 to 55 minutes, until the crust is beautifully golden and the cherry juices bubble up invitingly between the lattice strips. If the edges brown too quickly, loosely cover them with foil to prevent burning.
Step 6: Cool and Enjoy
Patience pays off here. Let your pie cool for at least two hours to allow the filling to set properly, so you get clean, perfect slices. Serving this Fresh Cherry Pie with Lattice Crust Recipe a la mode with vanilla ice cream or a dollop of whipped cream will make it a crowd-pleaser every single time.
How to Serve Fresh Cherry Pie with Lattice Crust Recipe

Garnishes
A simple dusting of powdered sugar can add an elegant touch, or garnish individual slices with fresh mint leaves for a pop of color and refreshing contrast. A scoop of creamy vanilla ice cream or a spoonful of whipped cream perfectly complements the warm cherry filling, balancing the sweet and tart elements beautifully.
Side Dishes
This pie shines as a dessert on its own, but if you’re serving a full meal, light and fresh sides work best. Think crisp green salads with a tangy vinaigrette or a plate of mild cheeses and nuts to keep the theme harmonious without overpowering the flavors.
Creative Ways to Present
Try turning slices into mini dessert parfaits by layering pie pieces with whipped cream in clear glasses. Or, warm up slices and serve with a drizzle of chocolate sauce and toasted almonds. The lattice crust’s eye-catching design makes it perfect for sharing on special occasions, so don’t hesitate to let it take center stage at your table.
Make Ahead and Storage
Storing Leftovers
Cover your leftover pie loosely with aluminum foil or plastic wrap and keep it refrigerated. It will stay fresh for up to 3 days, perfect for a few delicious breakfasts or snacking moments.
Freezing
You can freeze the unbaked pie for up to 1 month. Wrap it tightly in plastic wrap and foil to protect it from freezer burn. When ready to bake, thaw overnight in the fridge and bake as directed. Baked leftovers don’t freeze as well, so best to enjoy fresh.
Reheating
Warm slices gently in the oven at 300°F (150°C) for 10-15 minutes to revive that freshly baked flavor and crispness. Avoid microwaving if you want to keep the crust flaky and avoid a soggy bottom.
FAQs
Can I use frozen cherries for this Fresh Cherry Pie with Lattice Crust Recipe?
Absolutely! Frozen cherries work just as well as fresh ones. Be sure to thaw and drain excess juice before cooking to avoid a runnier filling.
What if I don’t have almond extract?
No worries! It’s optional and just adds a subtle depth. You can skip it without sacrificing the overall flavor, or add a little extra vanilla to compensate.
How do I prevent the crust edges from burning?
Cover the edges with foil or a pie crust shield about halfway through baking to protect them from over-browning while the center finishes baking perfectly.
Why is my cherry filling too runny?
Make sure to use enough cornstarch to thicken the juices and cook the filling until it thickens on the stove before placing it in the crust. Also, chilling the pie before slicing helps the filling set.
Can I make the crust gluten-free?
With some recipe adjustments, yes! Use a gluten-free flour blend designed for baking and chill the dough well to help it hold together similarly to all-purpose flour.
Final Thoughts
There’s something truly special about making a pie from scratch, especially a Fresh Cherry Pie with Lattice Crust Recipe that showcases those beautiful red cherries and buttery crust with such charm. Whether it’s your first time or you’re a seasoned baker, this recipe brings warmth, joy, and a touch of nostalgia to your kitchen. So grab those cherries, roll up your sleeves, and treat yourself and loved ones to a slice of pure happiness.
Print
Fresh Cherry Pie with Lattice Crust Recipe
- Prep Time: 35 minutes
- Cook Time: 50 minutes
- Total Time: 1 hour 25 minutes
- Yield: 8 servings
- Category: Dessert
- Method: Baking
- Cuisine: American
Description
This classic Cherry Pie features a flaky homemade crust filled with a luscious cherry filling made from fresh or frozen cherries. The filling is perfectly sweetened and thickened, enhanced with subtle hints of almond and vanilla extracts. Baked to golden perfection with an optional lattice or full crust top, this pie is a delightful dessert that’s perfect for any occasion. Serve it warm or cooled, with ice cream or whipped cream for an extra special treat.
Ingredients
Pie Crust
- 2 1/2 cups all-purpose flour
- 1 teaspoon salt
- 1 tablespoon sugar
- 1 cup (2 sticks) unsalted butter, cold and cut into cubes
- 1/4 cup ice water (more if needed)
Cherry Filling
- 4 cups fresh or frozen cherries (pitted)
- 3/4 cup granulated sugar (adjust based on cherry sweetness)
- 2 tablespoons cornstarch
- 1 tablespoon lemon juice
- 1/4 teaspoon almond extract (optional)
- 1/4 teaspoon vanilla extract
- Pinch of salt
To Finish
- 1 tablespoon heavy cream or milk
- 1 tablespoon coarse sugar (for sprinkling on top)
Instructions
- Make the Pie Crust: In a large bowl, mix the flour, salt, and sugar together. Add the cold, cubed butter and use a pastry cutter or your fingers to work the butter into the flour mixture until it resembles coarse crumbs.
- Add Ice Water: Gradually add ice water, one tablespoon at a time, mixing with a fork until the dough begins to come together. You may need more water depending on humidity. Be careful not to overwork the dough.
- Chill the Dough: Divide the dough into two equal portions, shape them into discs, wrap tightly in plastic wrap, and refrigerate for at least 30 minutes.
- Prepare the Cherry Filling: In a medium saucepan, combine cherries, sugar, cornstarch, lemon juice, almond extract, vanilla extract, and a pinch of salt. Stir to combine.
- Cook the Filling: Cook over medium heat, stirring constantly, until cherries release their juices and the mixture thickens, about 5-7 minutes.
- Cool the Filling: Remove the filling from heat and allow it to cool while rolling out the dough.
- Preheat the Oven: Preheat your oven to 375°F (190°C).
- Roll Out Bottom Crust: On a lightly floured surface, roll out one dough disc into a circle to fit a 9-inch pie dish. Place it into the dish, pressing gently into the bottom and up the sides.
- Add Filling: Pour the cooled cherry filling evenly into the prepared pie crust.
- Prepare Top Crust: For a lattice crust, roll out the second dough disc and cut into strips. Arrange strips in a criss-cross pattern over the filling. For a full top crust, place the second disc over the filling, cut slits for steam, and crimp edges to seal.
- Brush and Sprinkle: Brush the top crust with heavy cream or milk, then sprinkle with coarse sugar.
- Bake the Pie: Place the pie on a baking sheet and bake for 45-55 minutes or until the crust is golden brown and filling bubbles through.
- Protect Crust Edges: If the crust edges brown too quickly, cover them with aluminum foil to prevent burning.
- Cool Before Serving: Let the pie cool for at least 2 hours before slicing to allow the filling to set. Serve plain or with vanilla ice cream or whipped cream.
Notes
- If cherries are very sweet, reduce the sugar in the filling accordingly.
- Use either fresh or frozen cherries; thaw frozen and drain excess liquid before cooking.
- Chilling the dough helps create a flakier crust.
- Cover edges with foil if they brown too fast during baking.
- Let pie cool completely for best slicing results and to let the filling set properly.
- Optional almond extract adds a lovely depth of flavor but can be omitted if preferred.


